type
Post
status
Published
date
Jul 4, 2023
slug
WSL-PHPStorm-Xdebug
summary
之前一直用的macOS,因为macOS后续更新有各种硬件不支持,所以趁着这个机会将主力系统换回Windows,但是Windows开发又有各种环境上的不方便,于是写下这篇文章记录一下
tags
学习
PHP
Linux
Windows
ArchLinux
category
技术分享
icon
password
🚈 尝试路径
- 虚拟机内使用PHPStudy,然后在虚拟机内进行开发调试
否决,在开启Hyper-V后,VMWare虚拟机太卡了,而且现在的小皮面板看起来不是很干净,各种带着广告有时候启动还会开个网页,个人不是很喜欢,虽然确实很方便就是
- WSL内安装Xdebug,通过PHPStorm远程调试
😋 开始安装
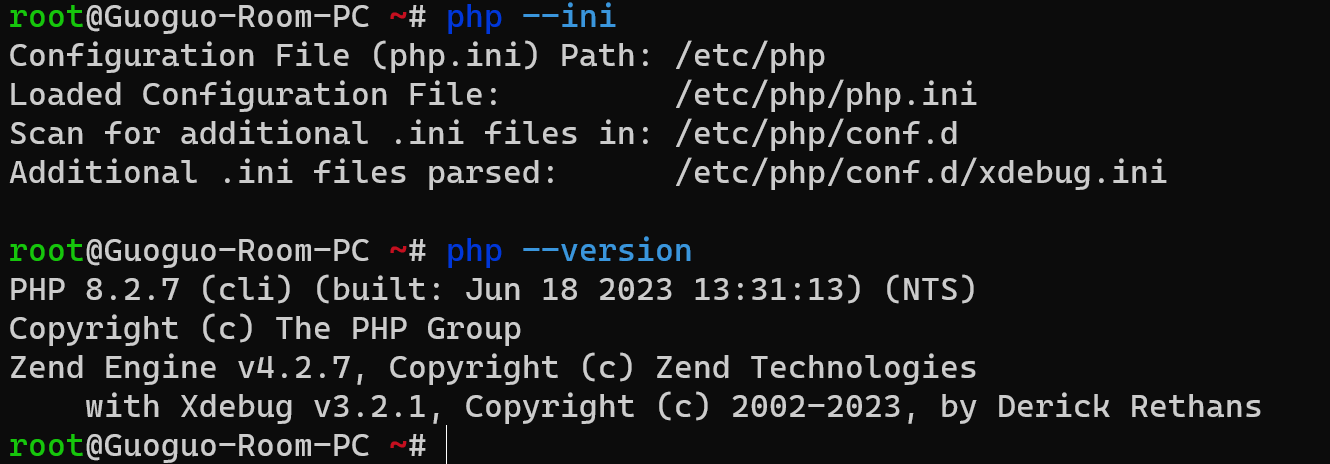
ArchWSL 安装 XDebug 的过程很简单,直接 pacman -S xdebug 即可,顺便还会将 PHP 装上。
安装完大概就会长这样的。
😕 配置 Xdebug
🧙♀️ WSL 的 Xdebug 配置
这里是折腾最久的,虽然配置只有短短几行……
我记得以前的 Xdebug 是由服务器直接提供服务,也就是服务器暴露一个 Xdebug 的窗口给外面的人来进行调试,自从 Xdebug 3 开始,情况变为了需要 Xdebug 主动连接远程客户端才会起作用 =。=
如图,编辑 /etc/php/conf.d/xdebug.ini
这里一定要写上 xdebug.start_with_request=true (顺带一提,Xdebug 的 ini配置文件真的好奇怪哦。。一会用true,一会用1,一会用On,一会用yes),这样才会在请求的时候开启调试,之前我试了半天都没有成,就是这个没给开起来 =。=
另外这里的client_host一定要填写Windows的IP!Windows的IP!Windows的IP!你管你用的是WiFi的IP还是WSL的网关IP都无所谓,只要能从WSL连到外面就行了!(可以通过telnet 网关地址 9003尝试,如果发现没反应的话,可能需要加一条防火墙规则)
New-NetFirewallRule -DisplayName "WSL" -Direction Inbound -InterfaceAlias "vEthernet (WSL)" -Action Allow只有这样xdebug才会去尝试连接PHPStorm,而且新版本已经没有remote_host了。
另外xdebug.discover_client_host这里设成false,因为从Windows直接访问wsl时,REMOTE_ADDR会是127.0.0.1,但是这样xdebug连接127.0.0.1是没法连到phpstorm的,还是需要直接连到外面的主机。
🪟 Windows PHPStorm 的 Xdebug 配置
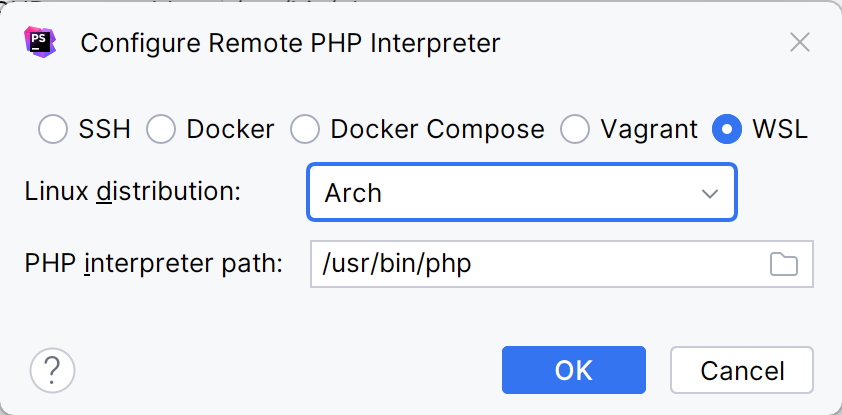
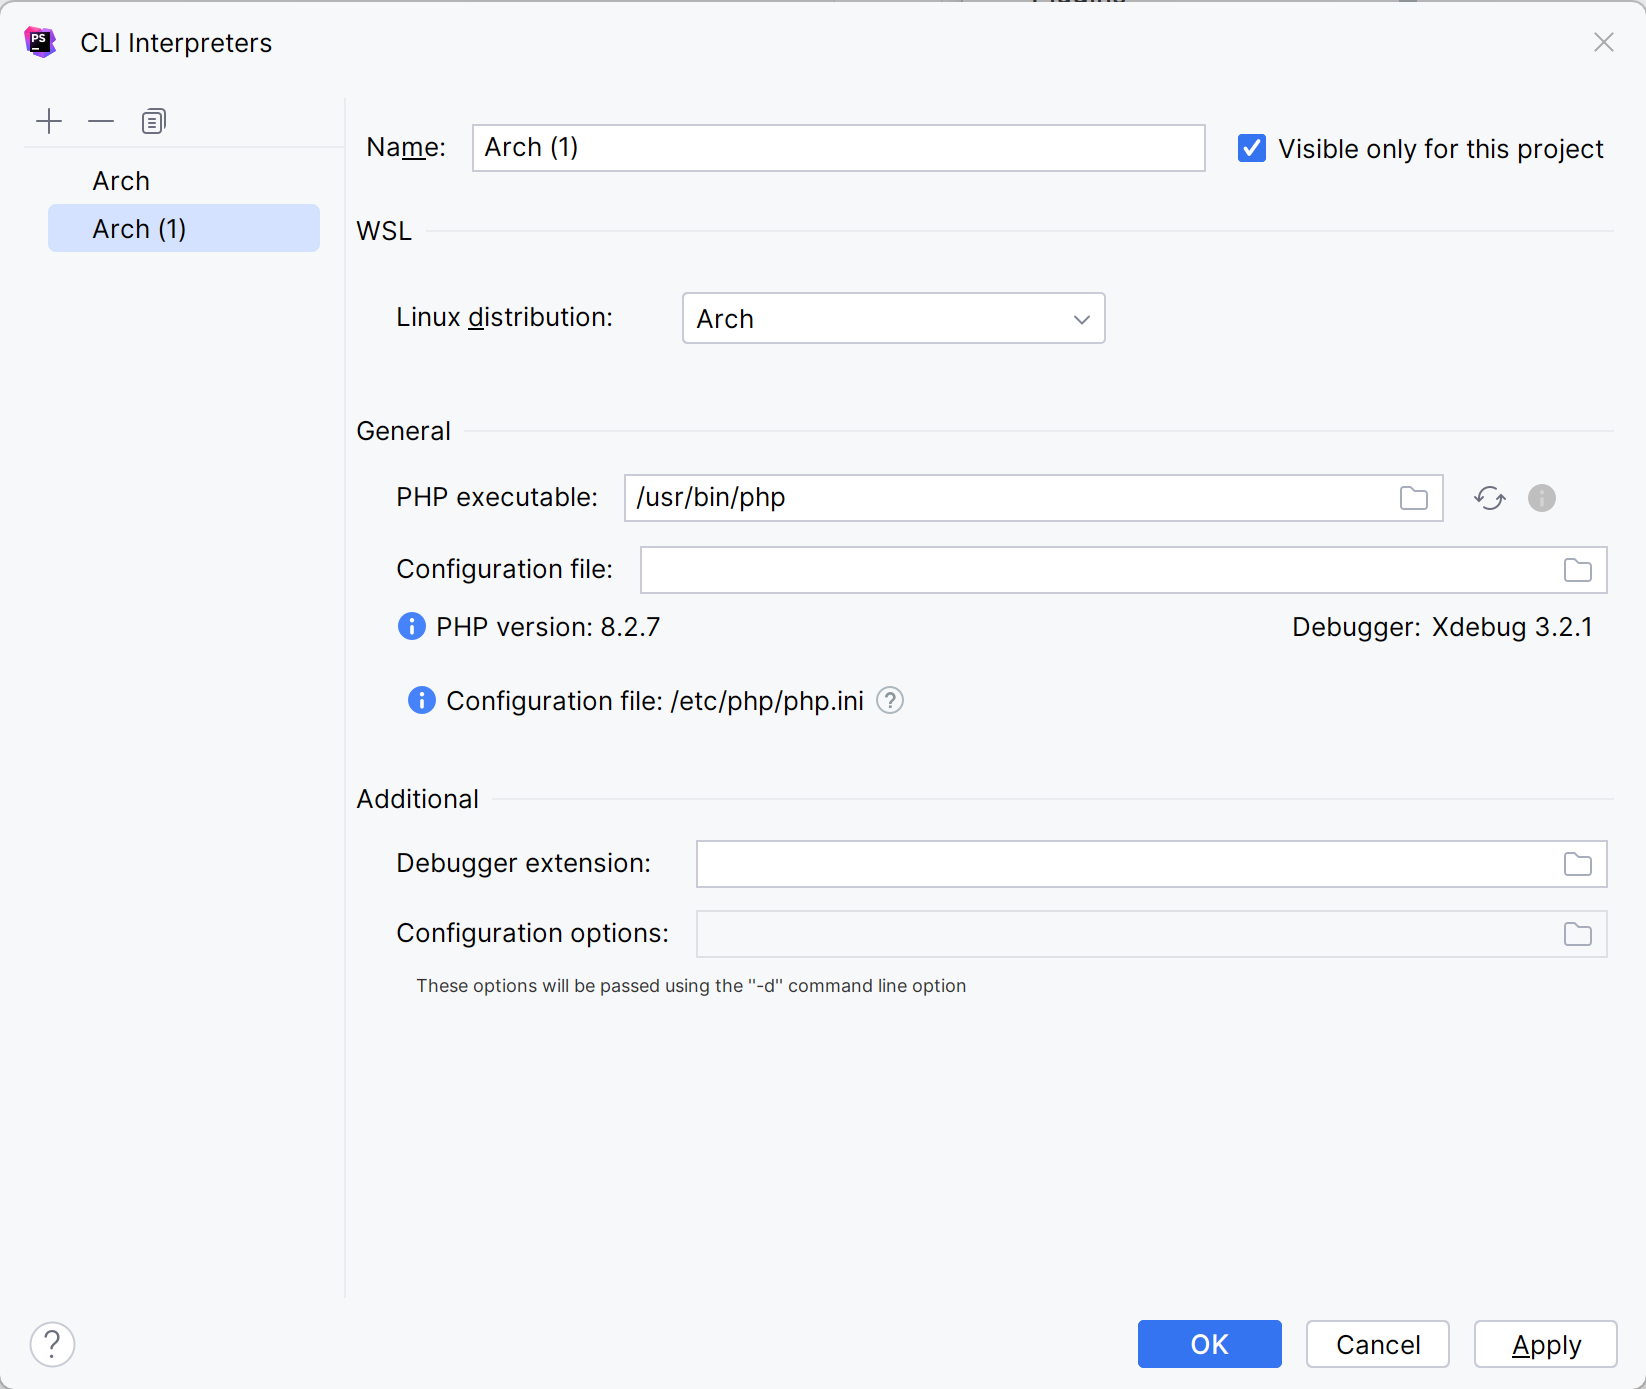
在 Settings→PHP 中,选择好正确的 PHP language level(比如我这里是 8.2 ),在 CLI Interpreter 下新建一个,检查 PHP interpreter path 和 Linux distribution 是否正确
正常来说的话,如果你上面配置正确了,那么下面的Debugger extension 就不需要你手动填写了,它会自动弹出版本,就像这样。
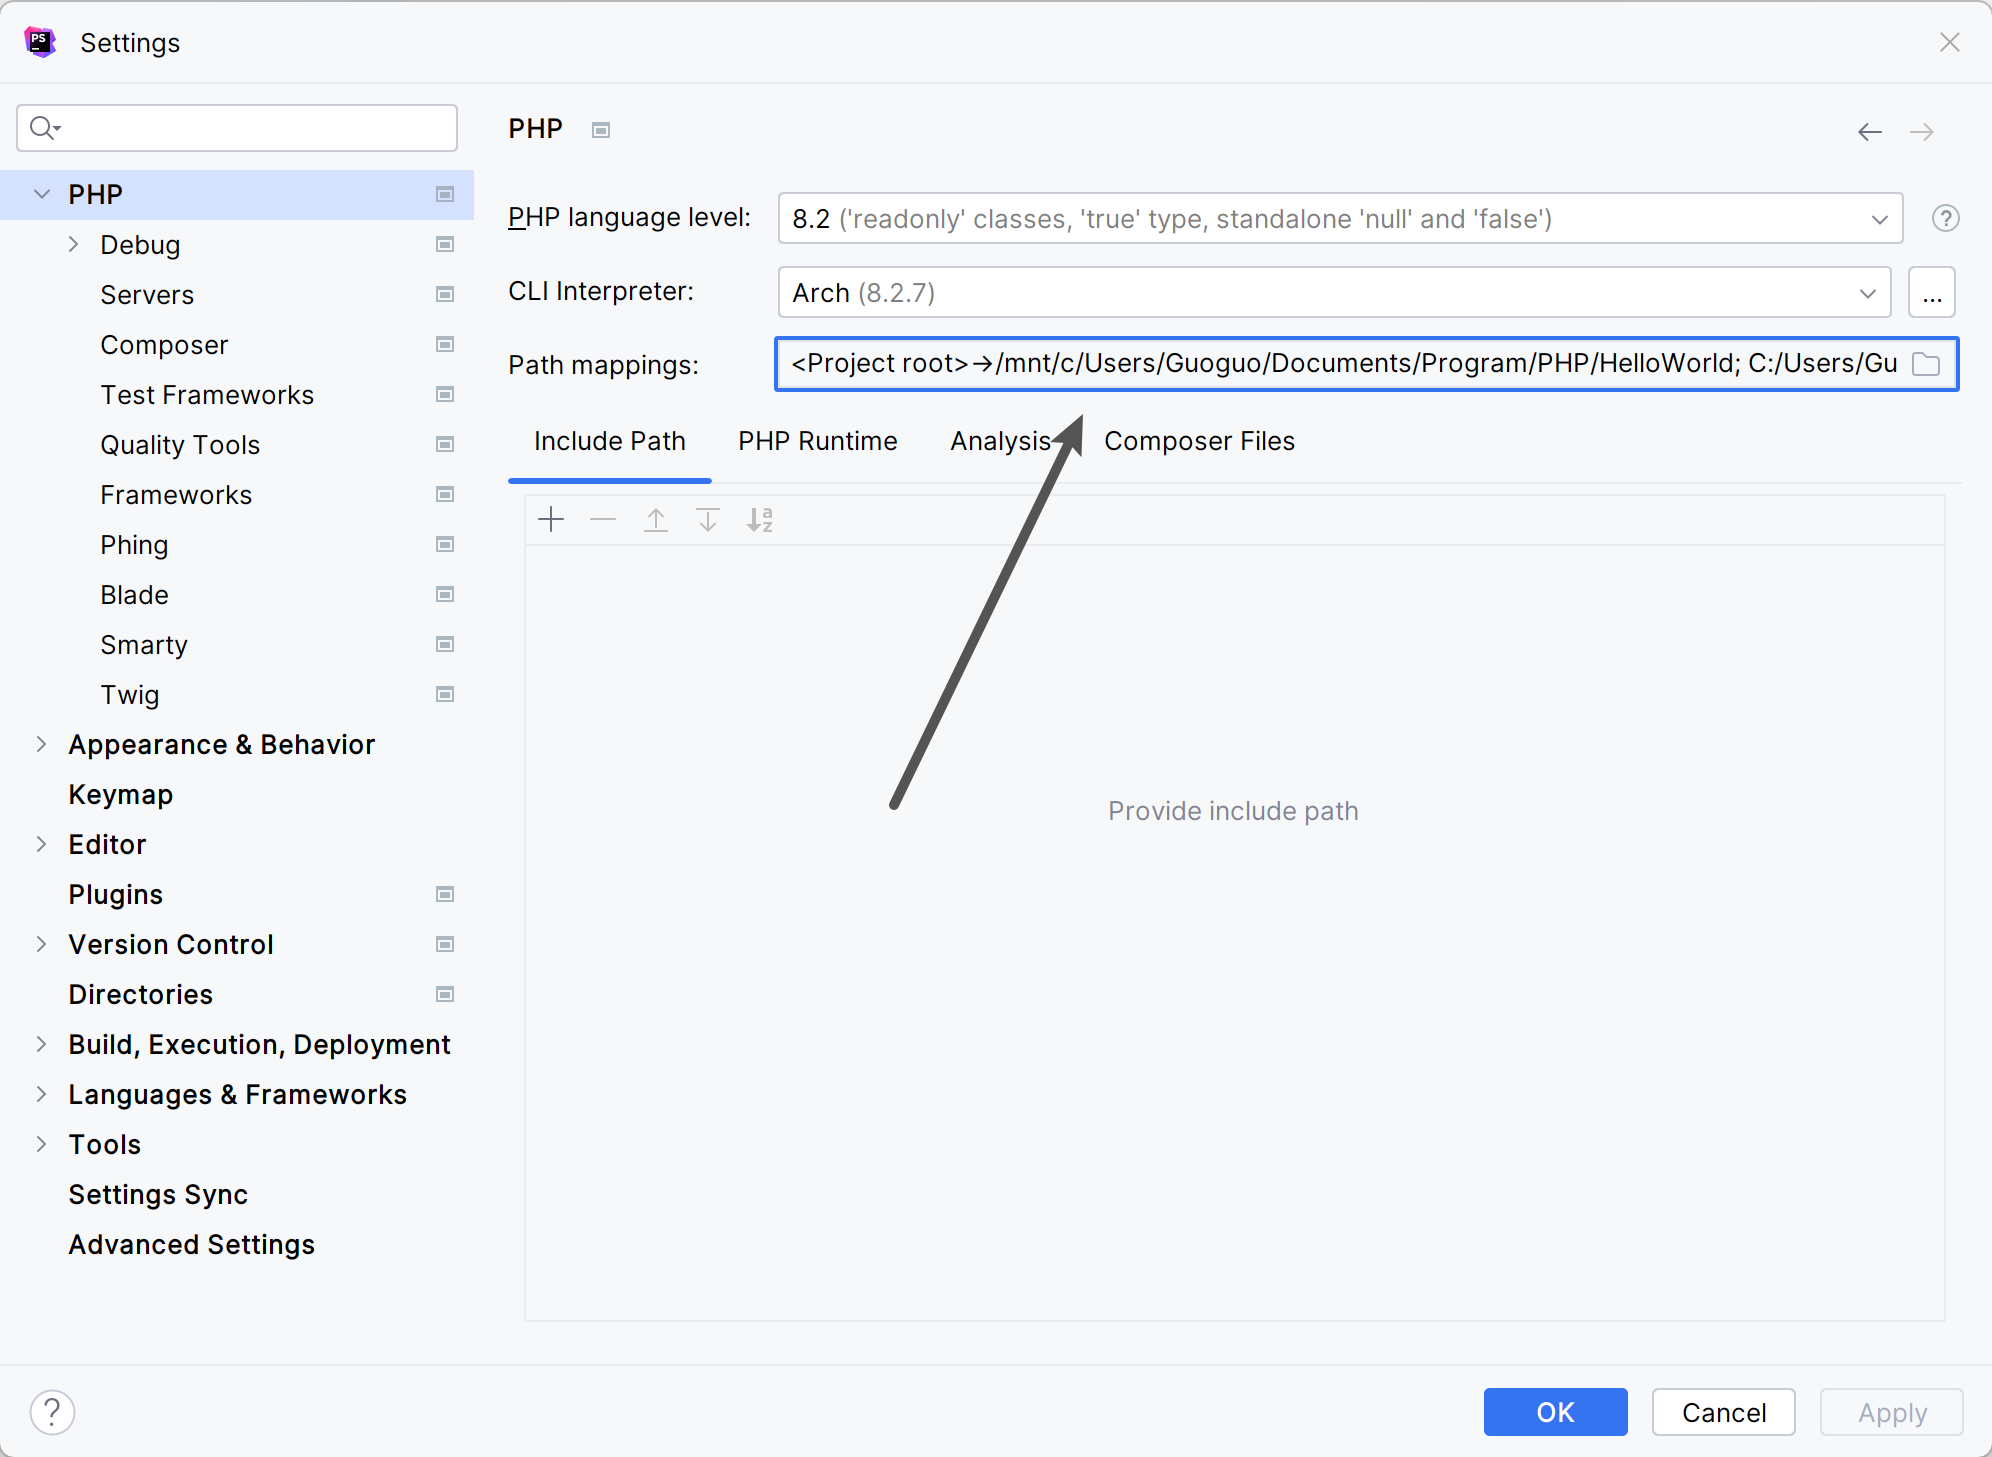
正常来说,你会在外面看到这个映射。
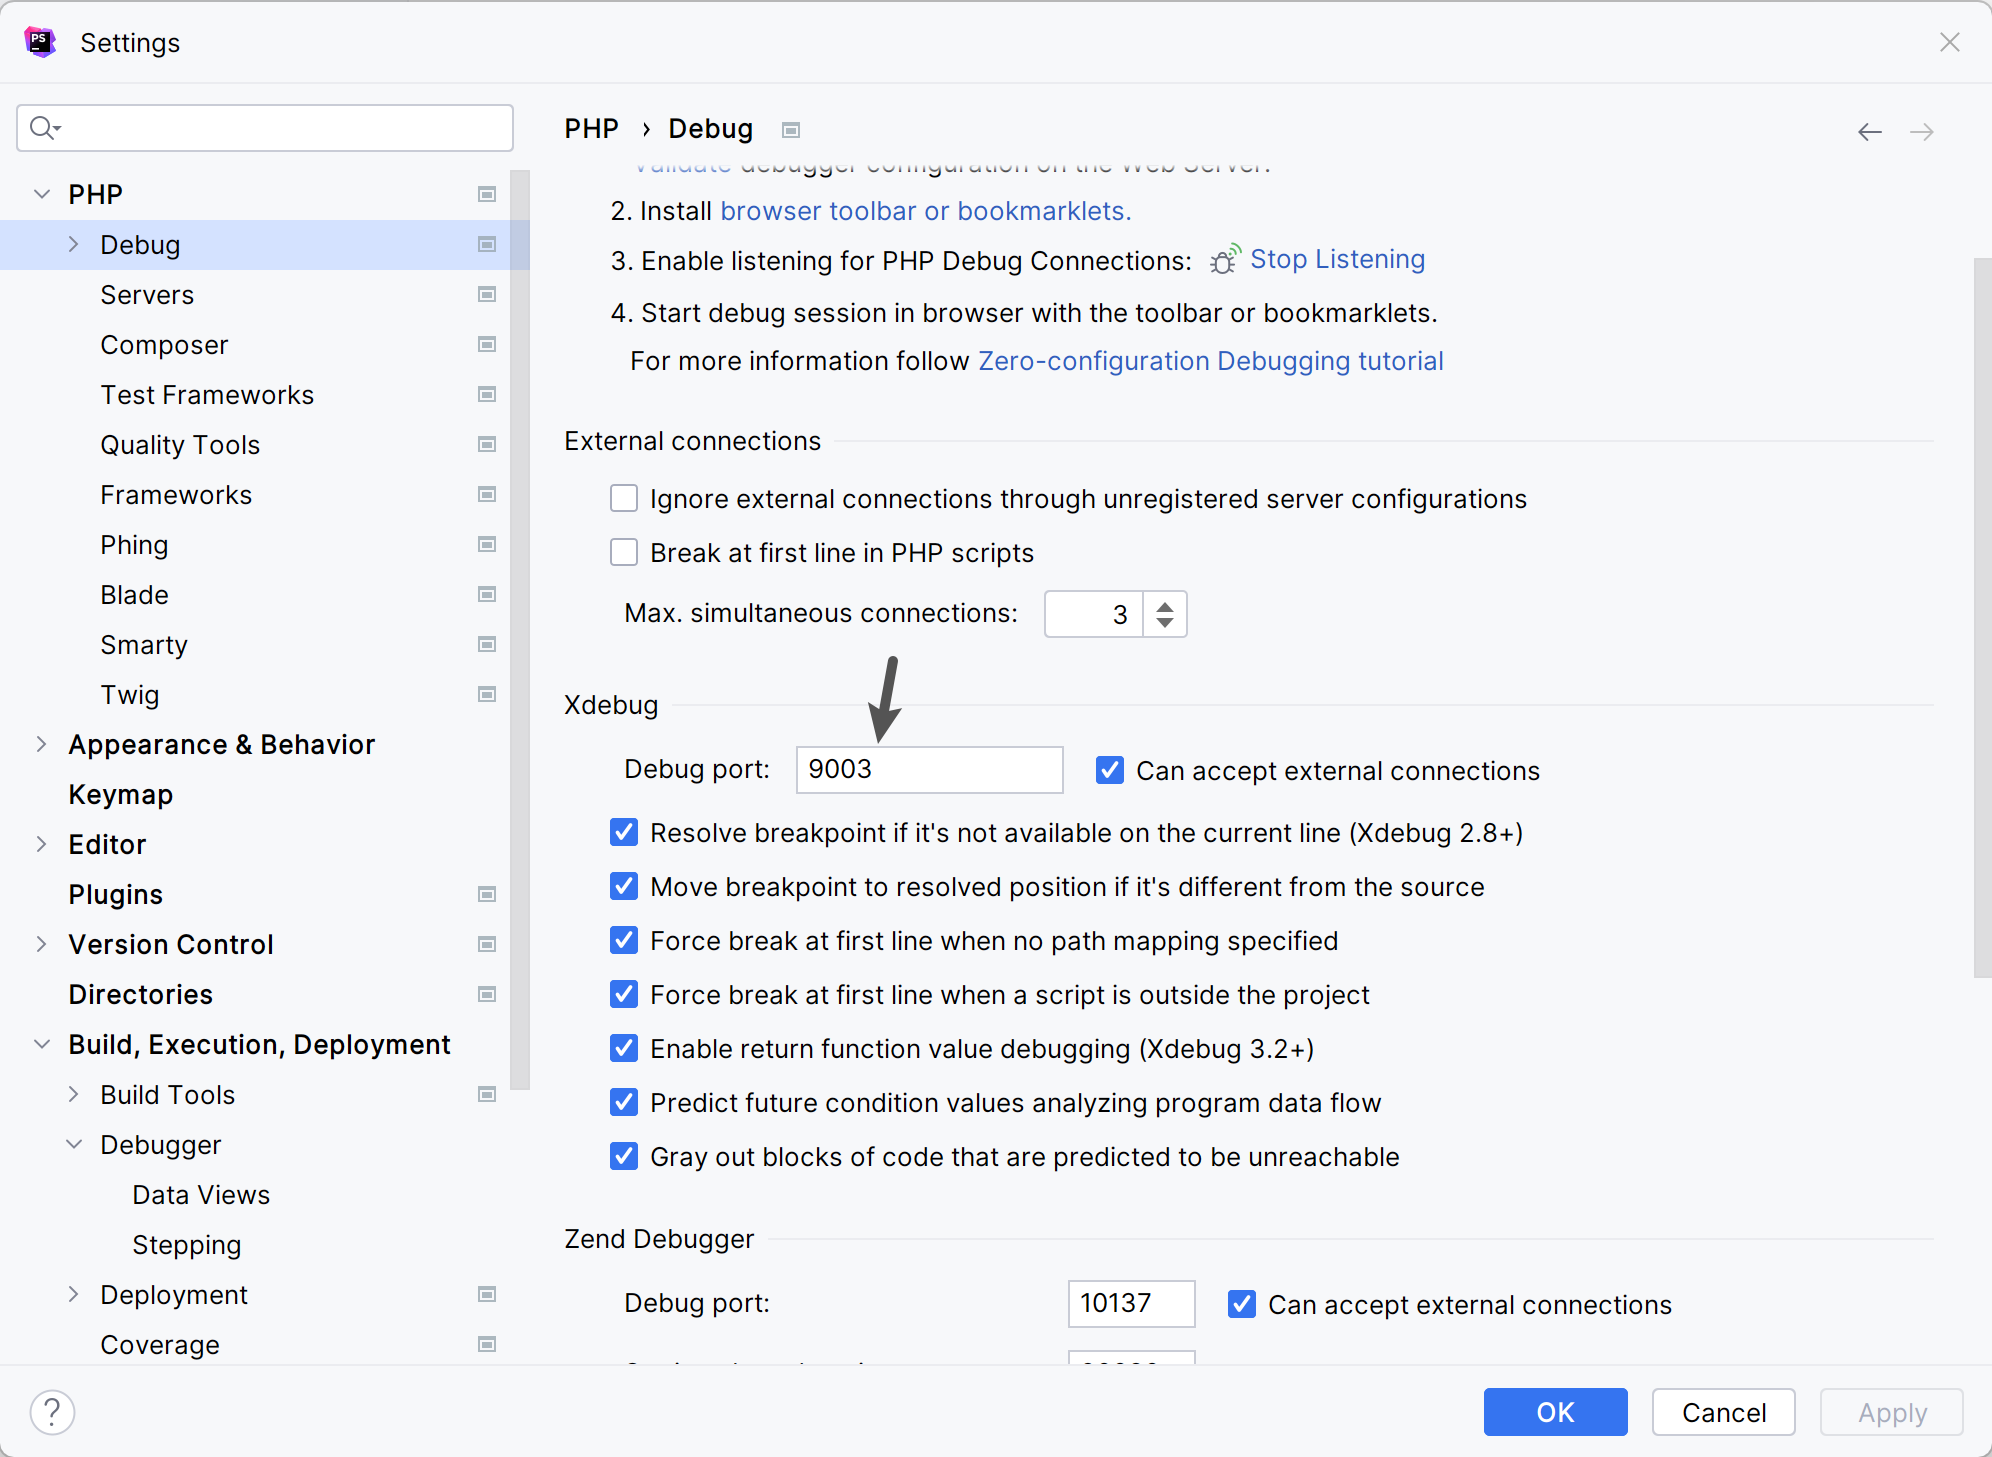
在 Settings→PHP→Debug 处检查 Debug port 是否有 9003
🤗 创建 Run/Debug Configuration
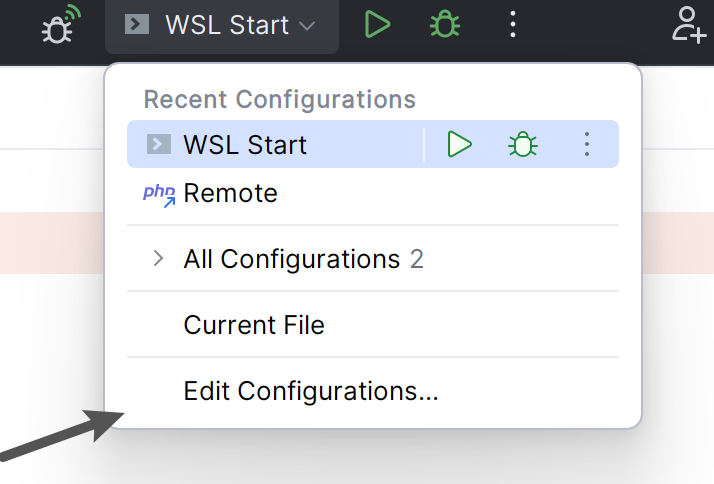
右上角点箭头,选择 Edit Configurations
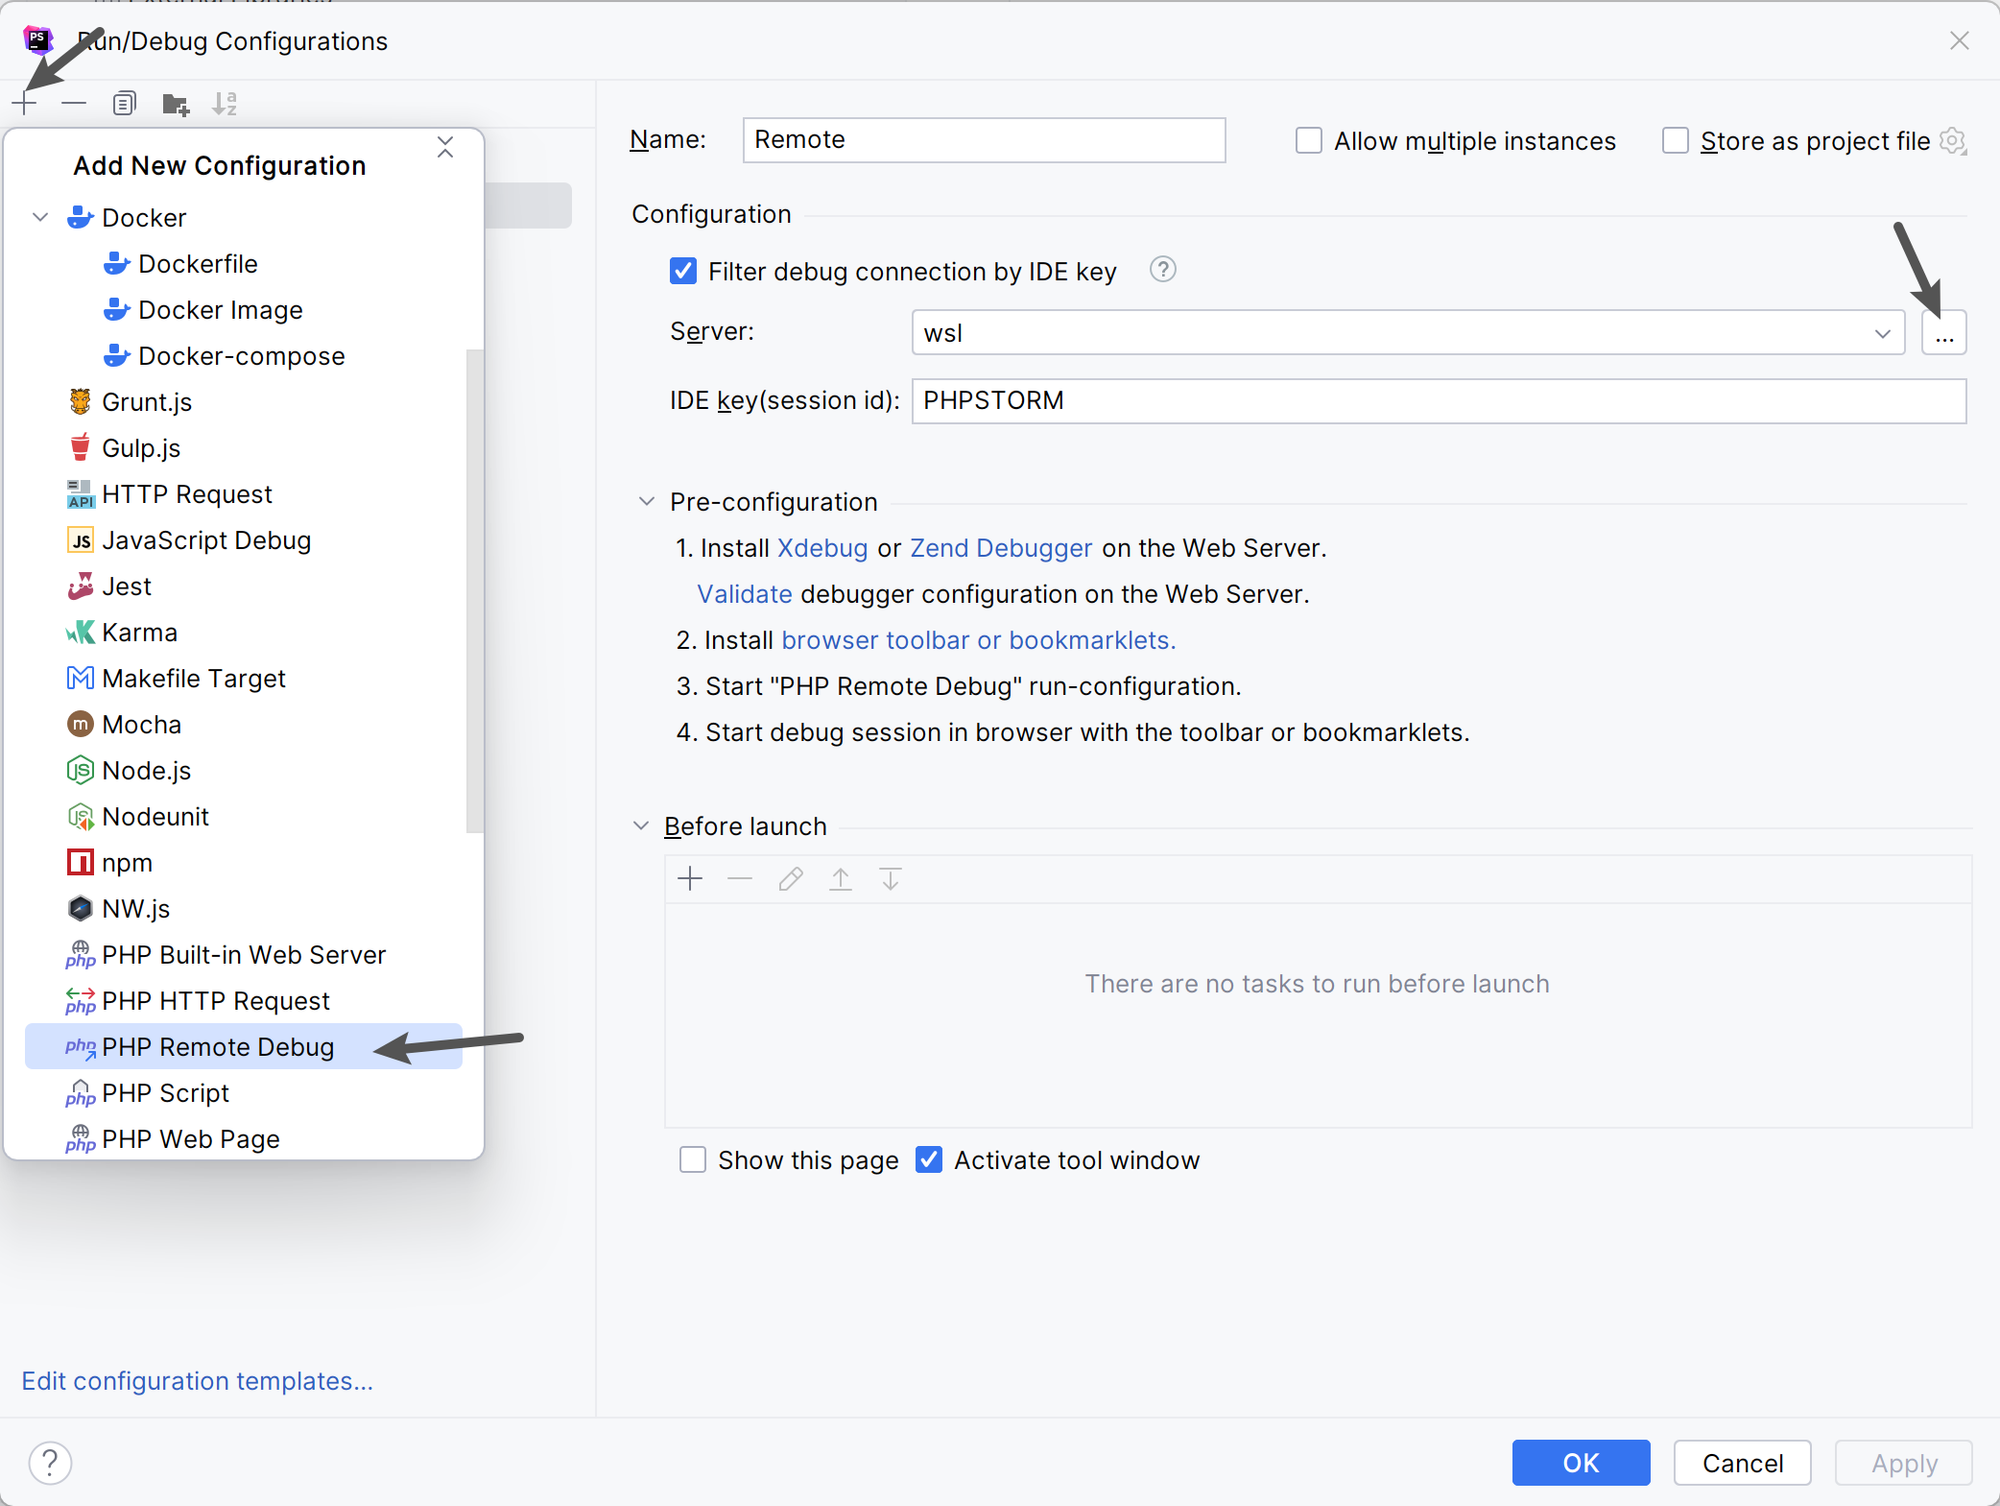
点击加号,点击PHP Remote Debug,IDE key写PHPSTORM(虽然上面没写,但这里好像必须写点东西?),点击Server右边的三个点
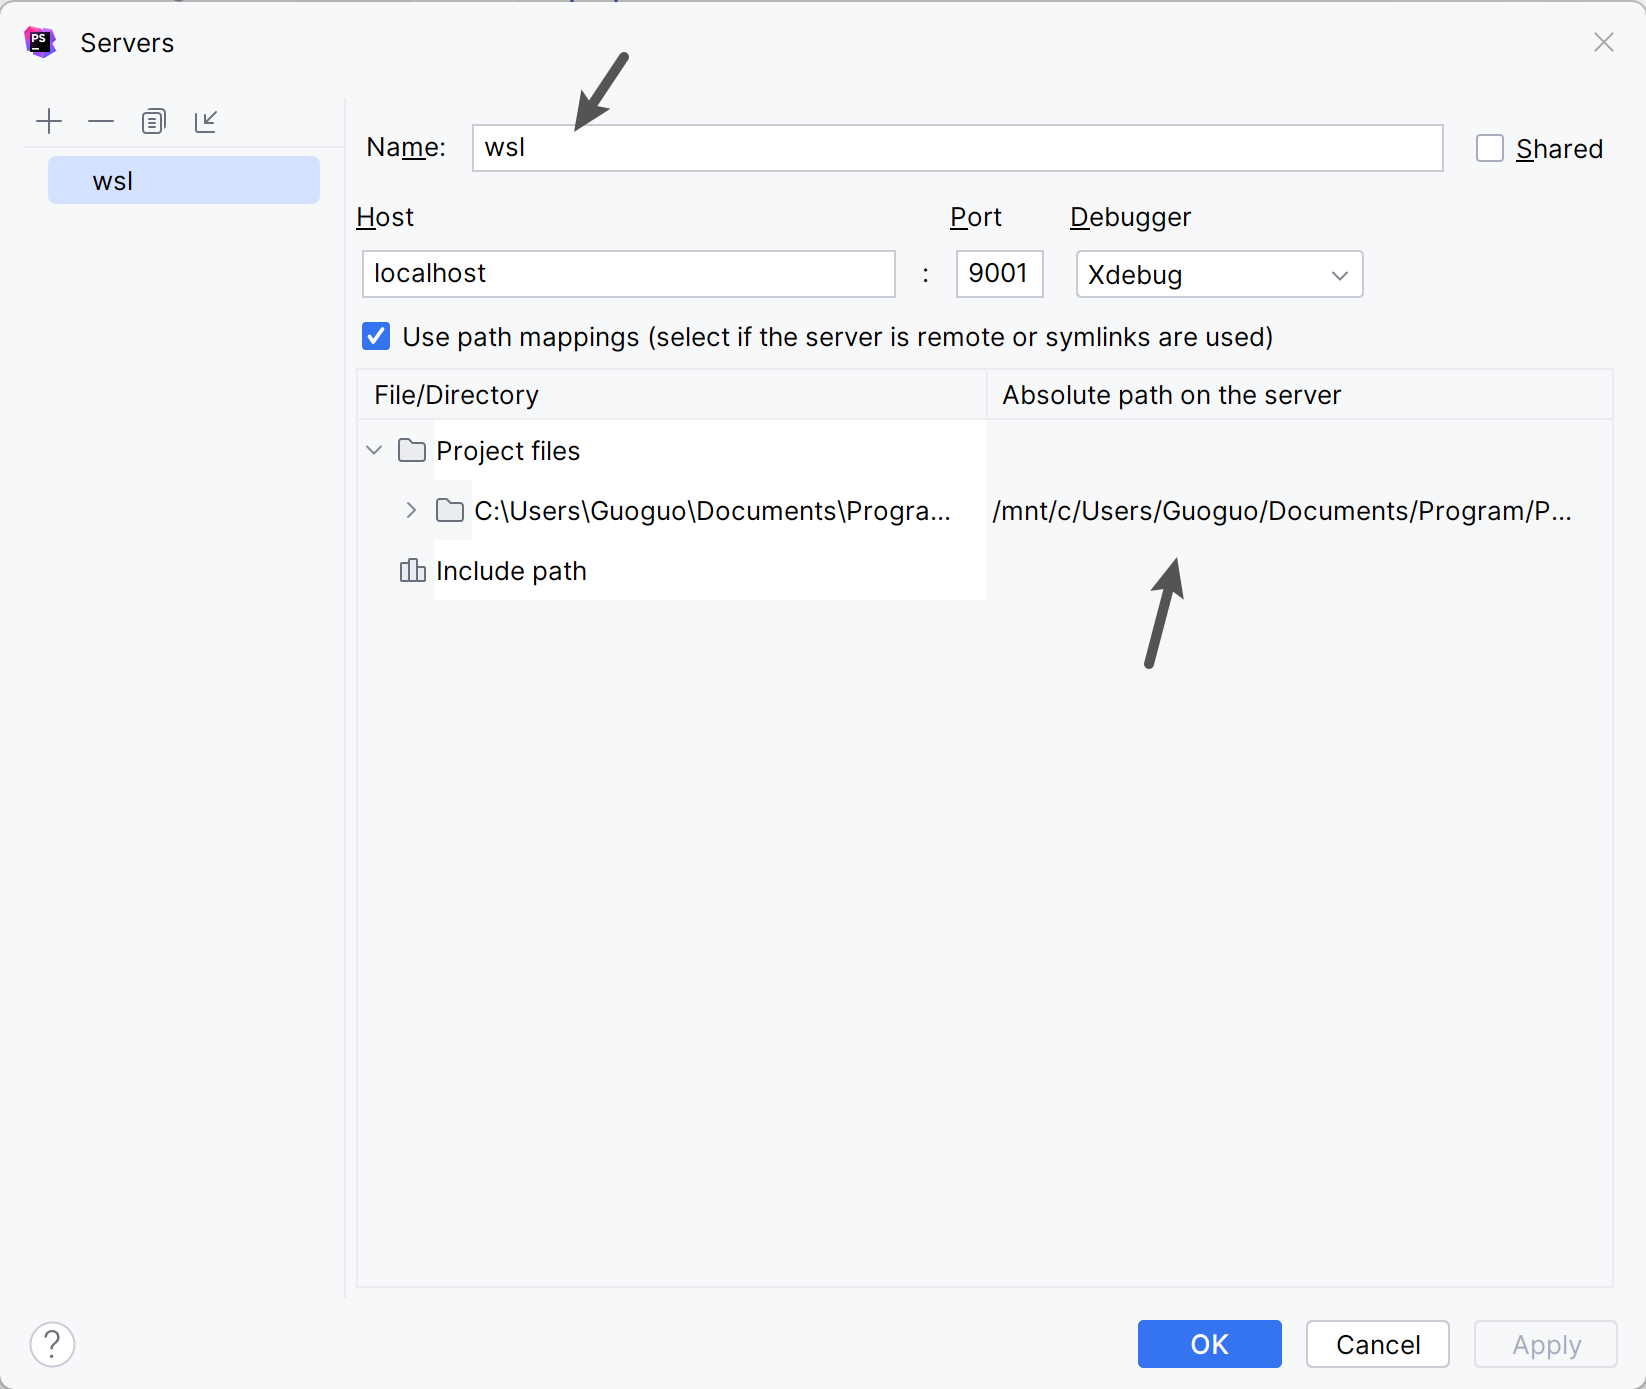
随便写个Name,然后设置好Host和Port(这里可以设置 localhost 和 9001,Absolute path 对应设置)
再开一个设置 Shell Script,设置Execute为Script text,内容填写
start http://localhost:9001; wsl php -S localhost:9001 ,点击OK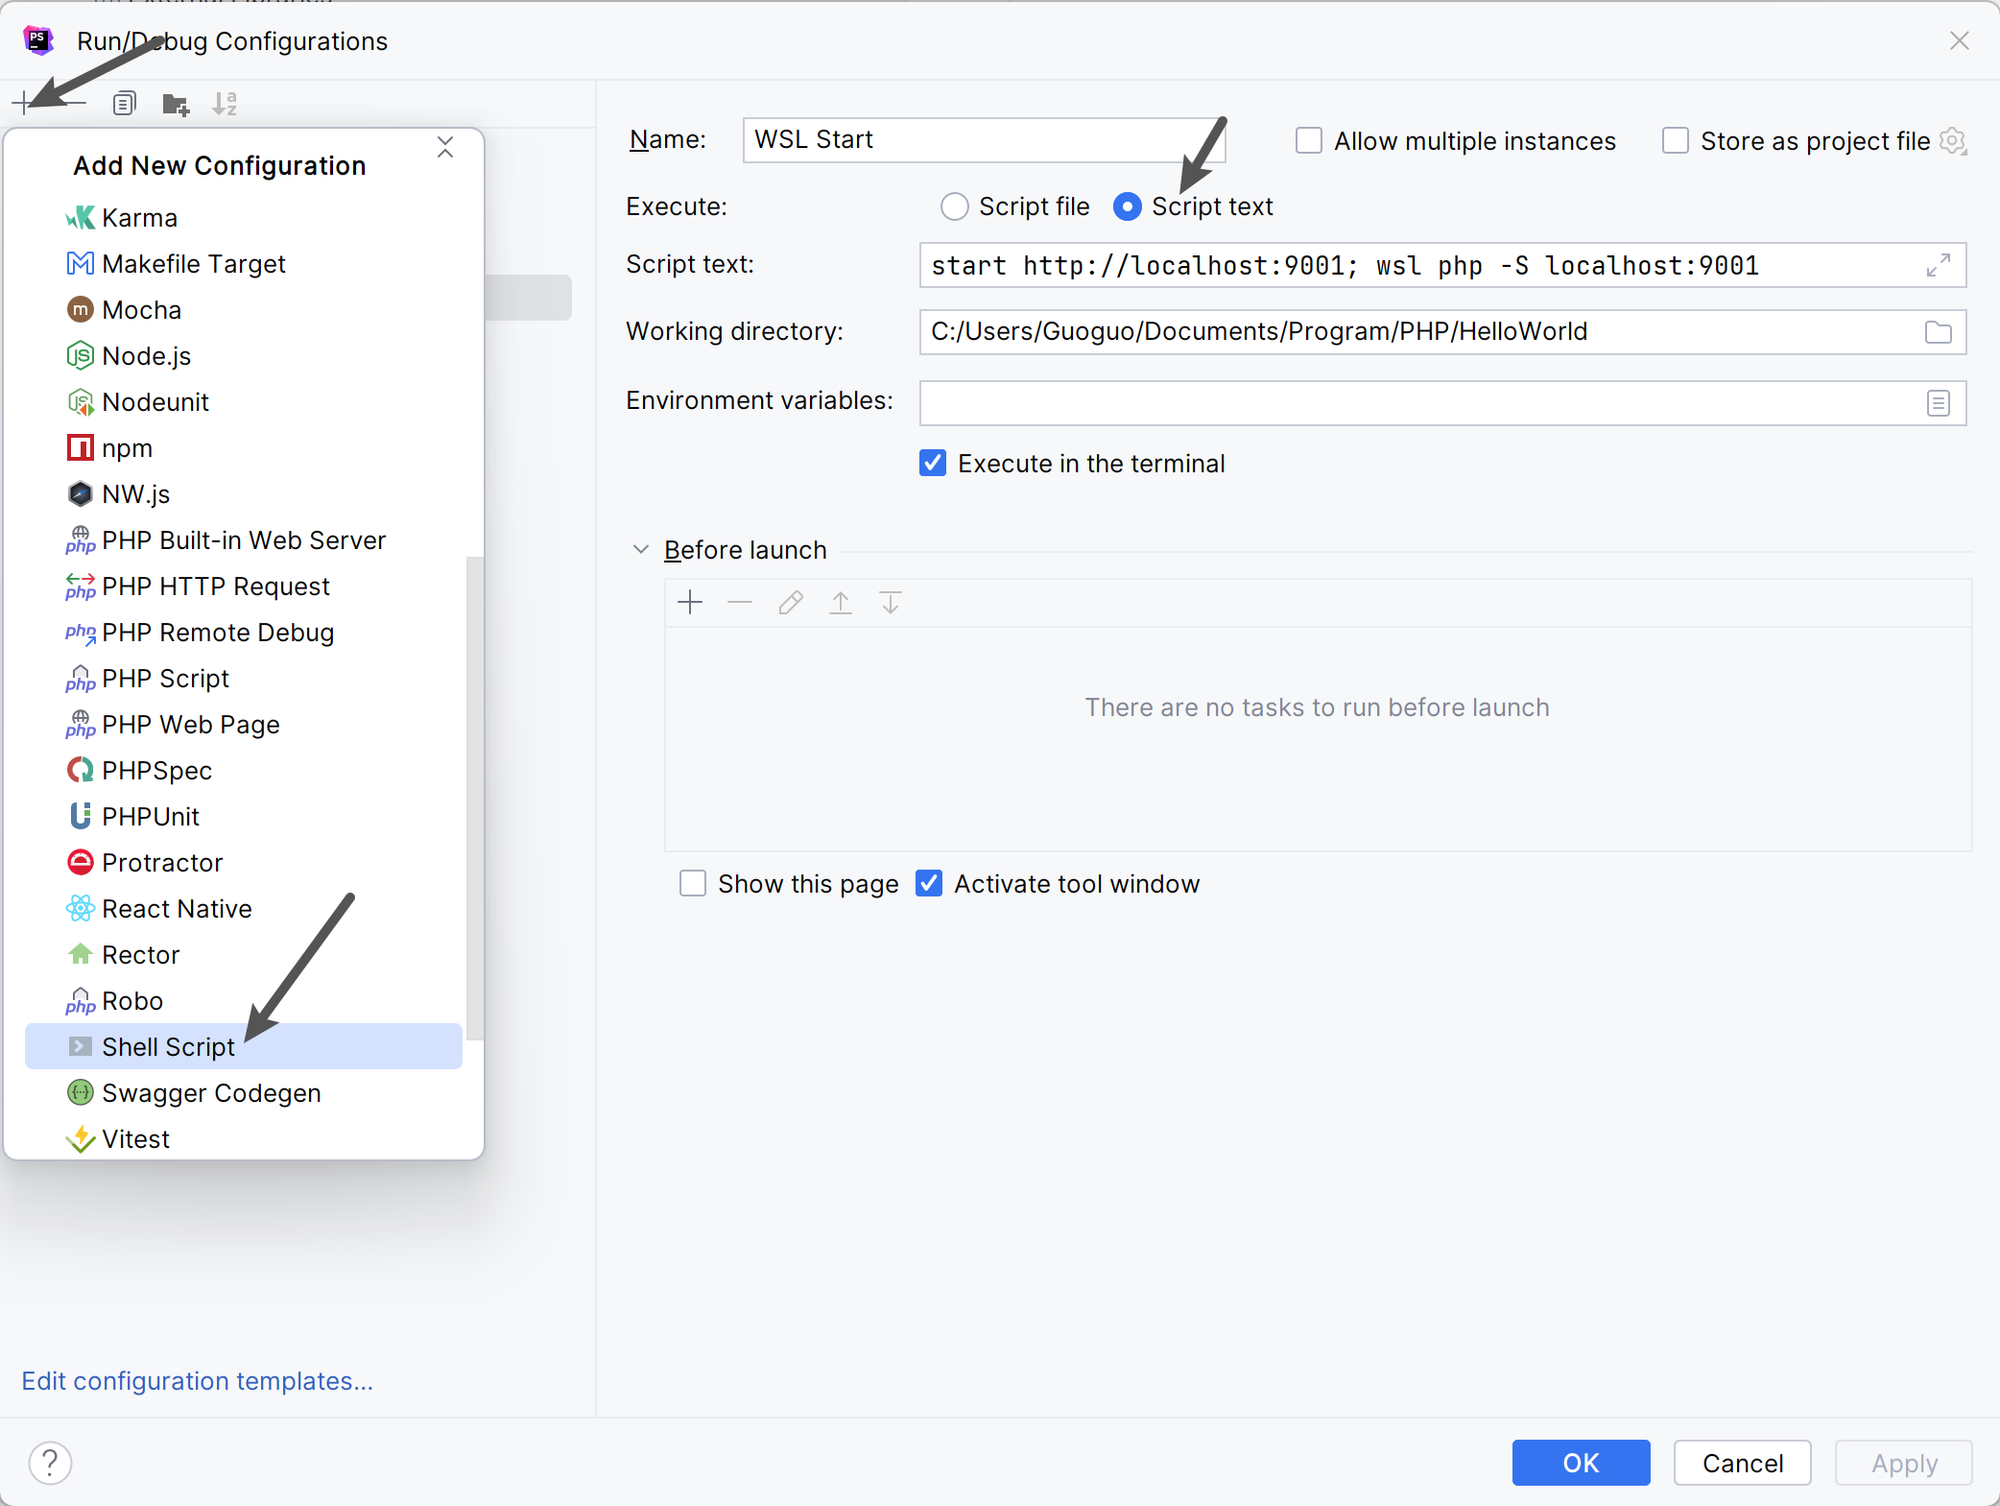
😠 PHP Xdebug,启动!
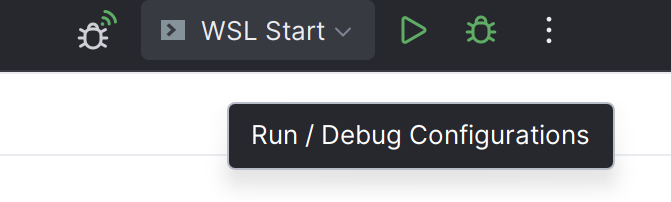
切换到刚才的script,点击绿色启动按钮
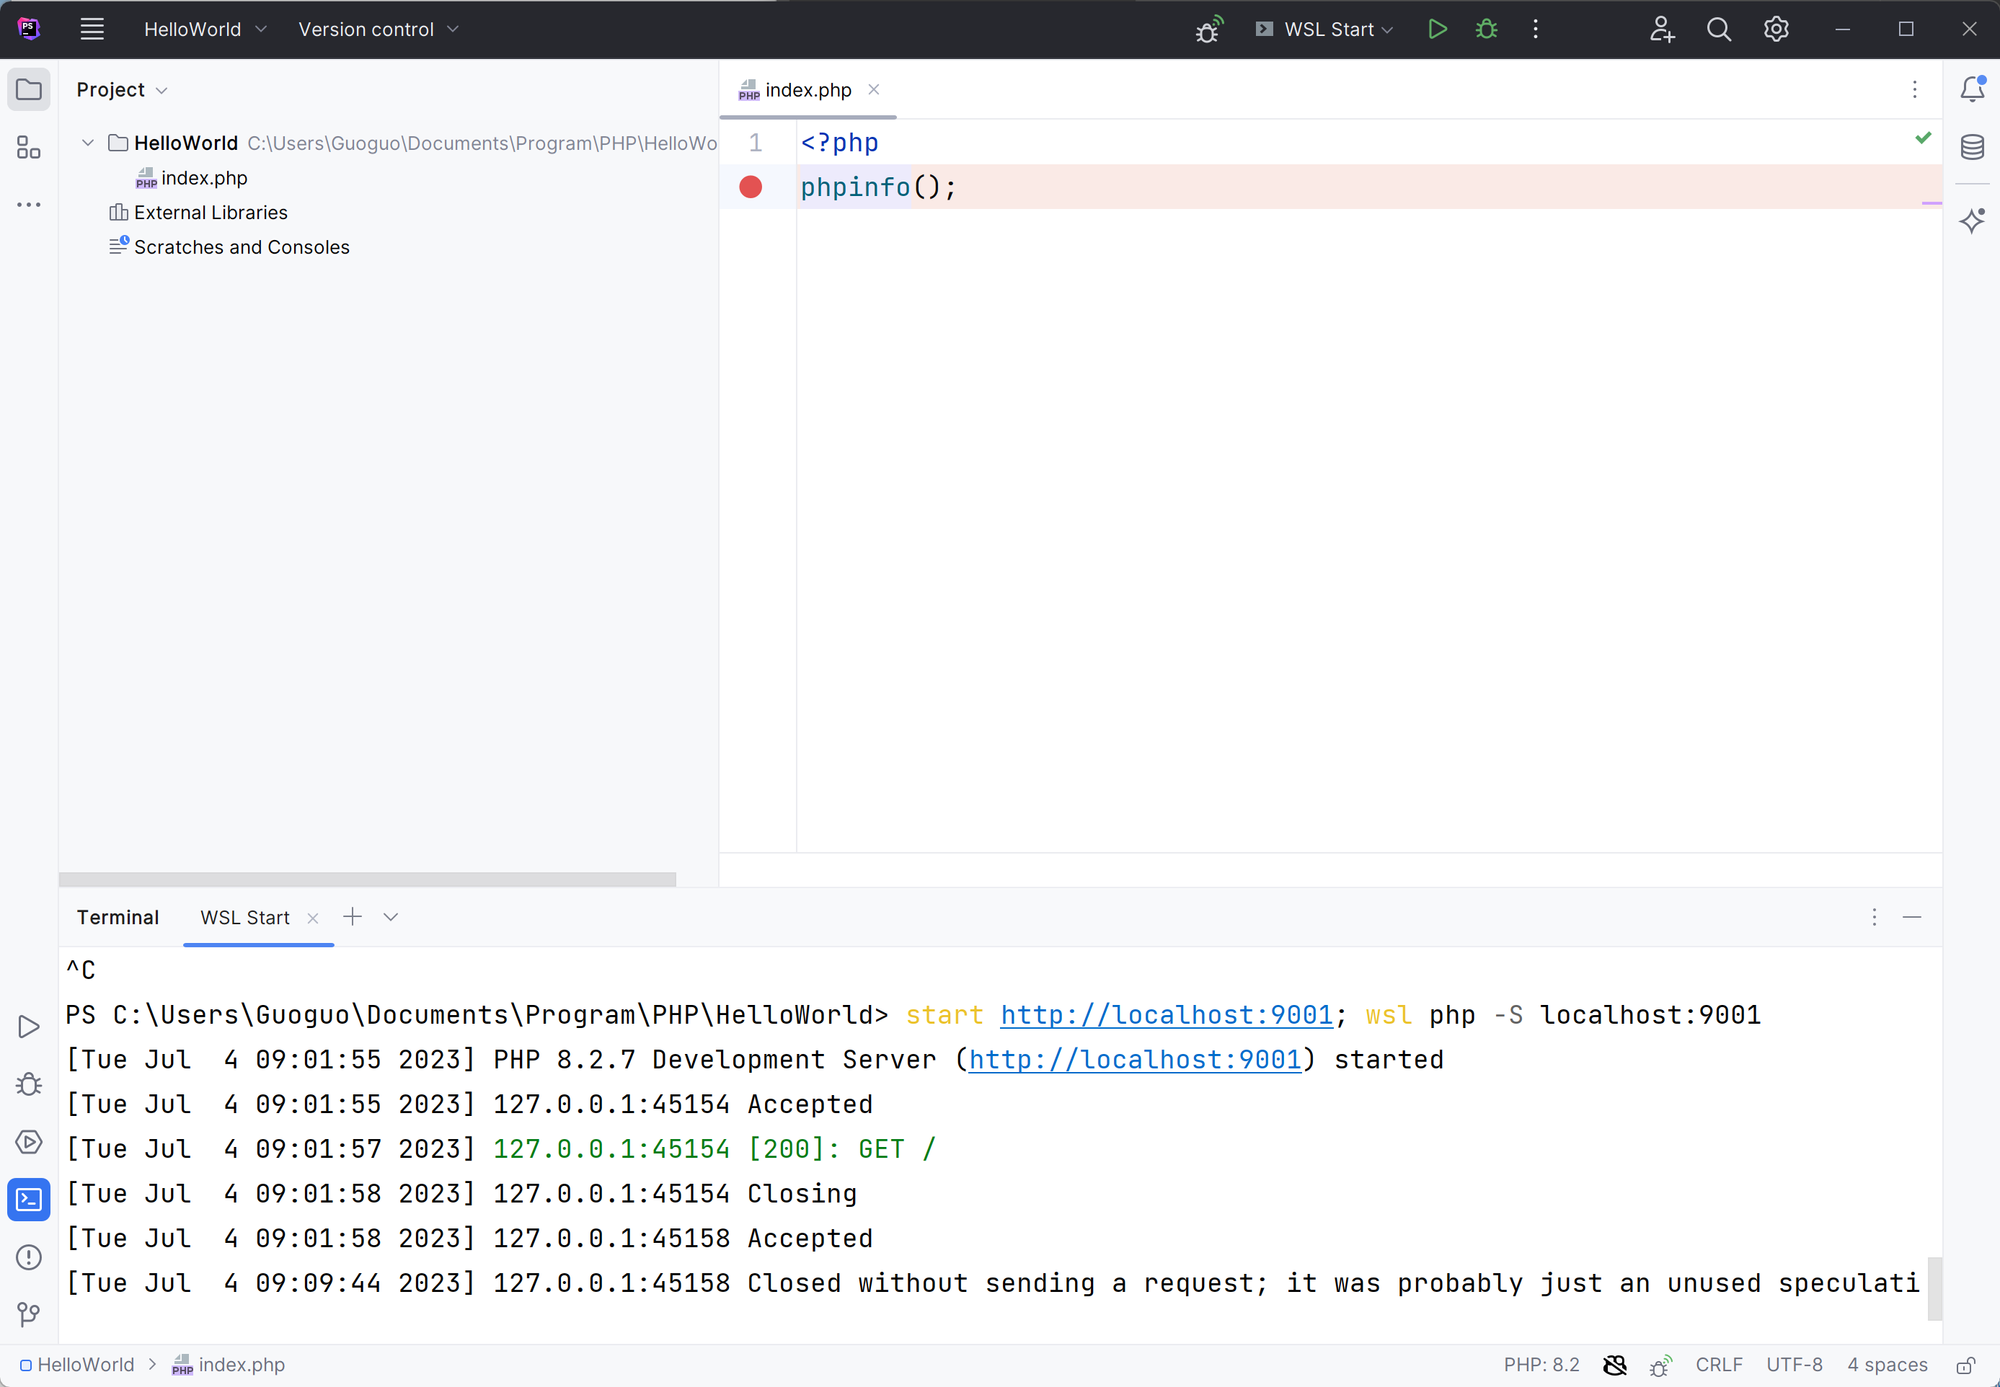
可以看到已经正常运行了,再打个断点访问一下试试?
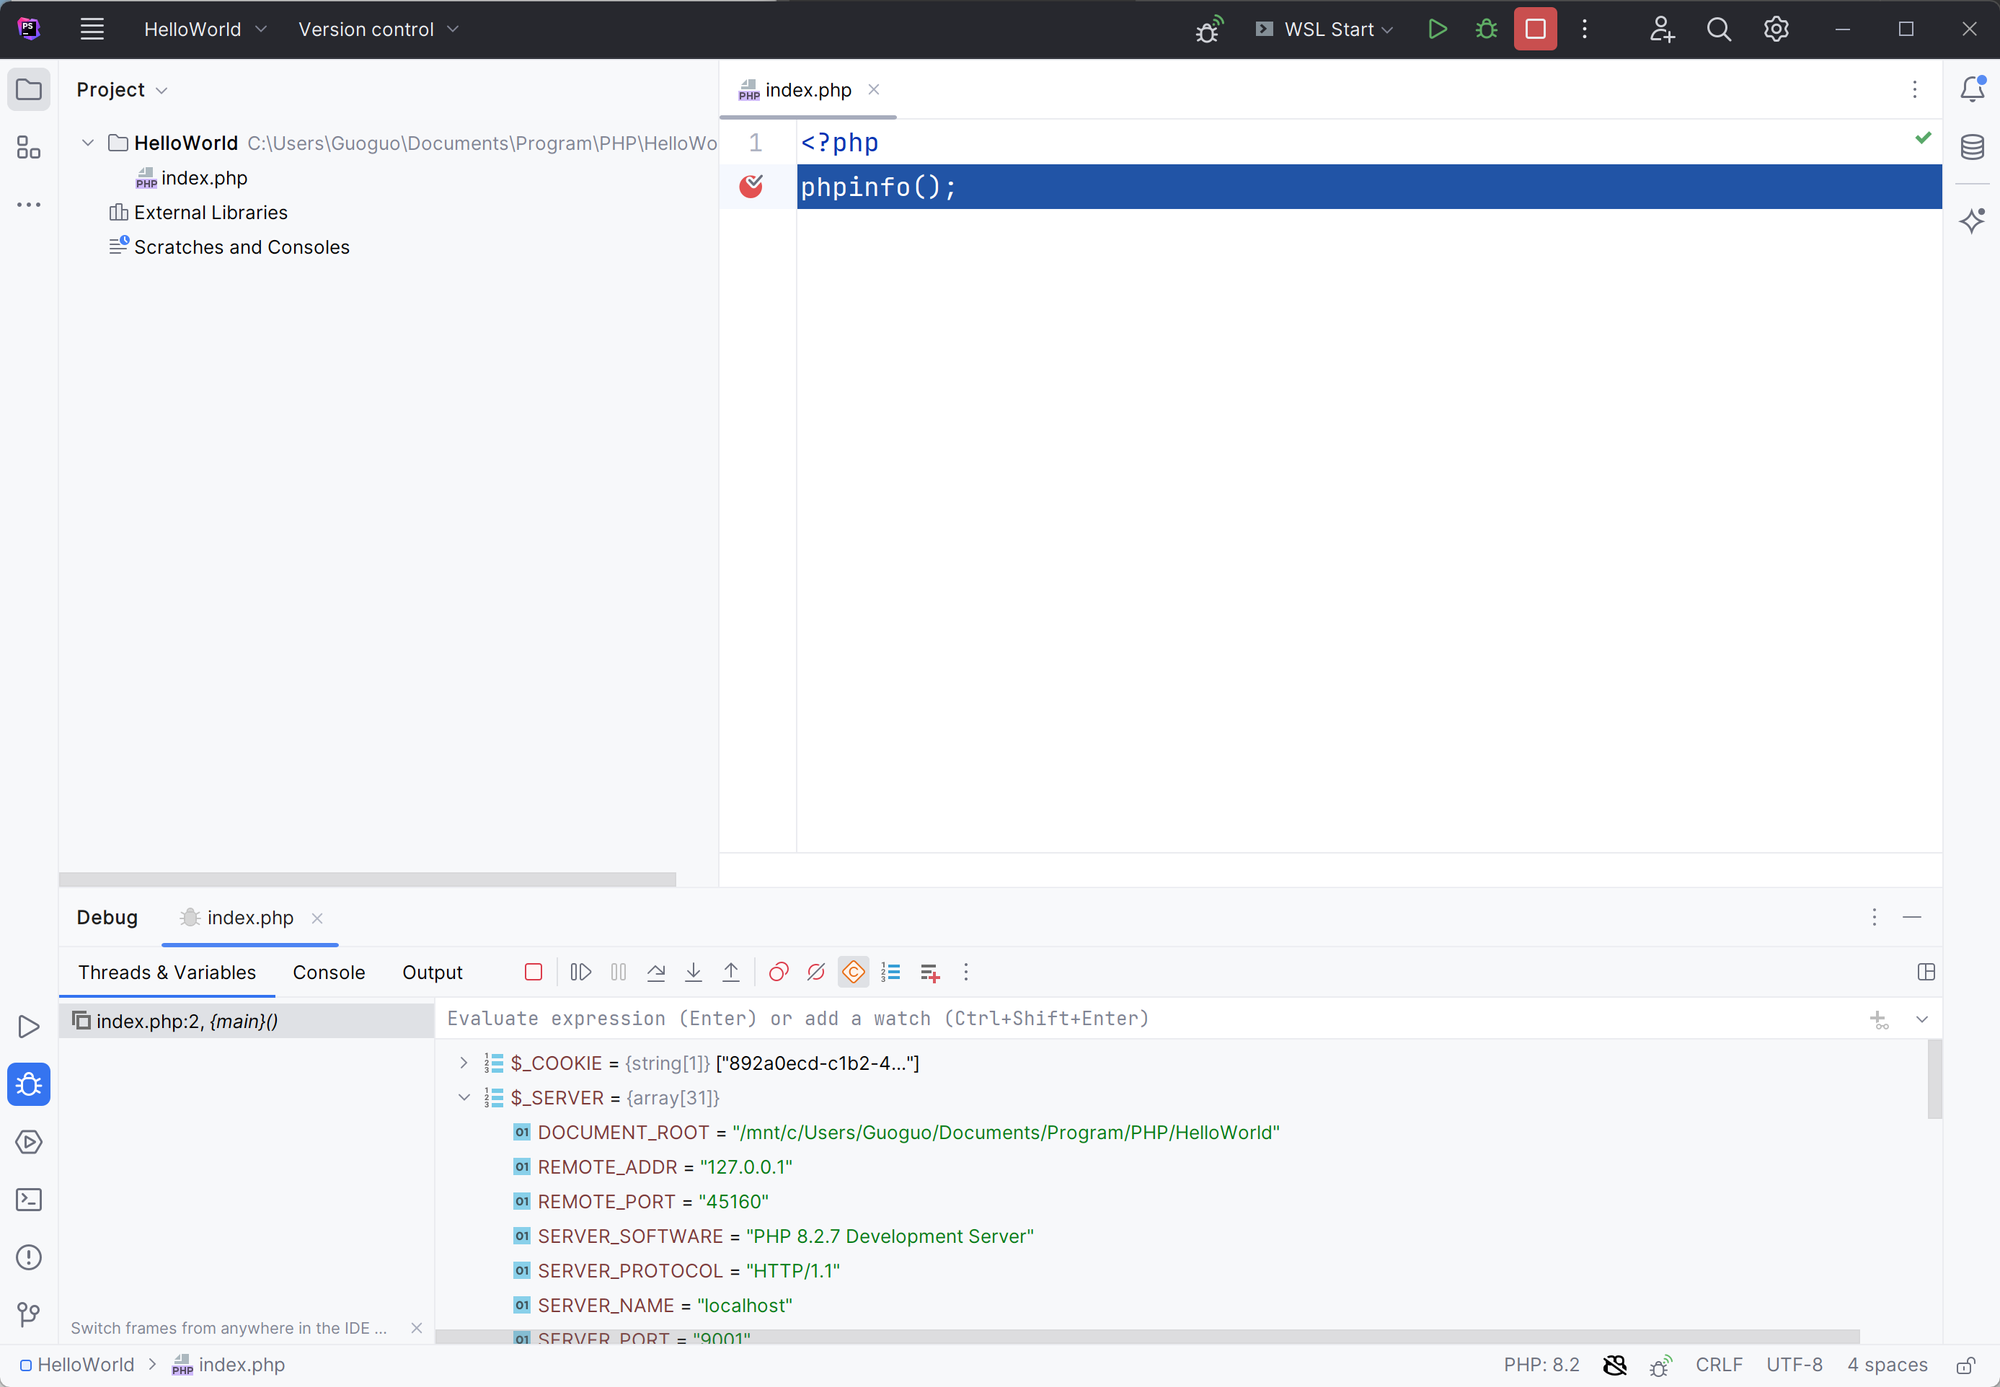
成了,一切正常


